
Home landscaping can feel like a huge undertaking and an extravagant investment of time and money – all of which can make the idea of having a meticulously designed garden space simply unattainable. While we know the value of having a professional landscaper come and create a masterpiece out of your home and lawn, we also know that it isn’t always realistic.
You don’t have to take out a second mortgage to get started on a beautiful garden design at home, though. If you start small and get started on the right foot, anyone can take on do-it-yourself home garden design projects.
A well-thought-out garden with a planned front yard and backyard landscape can help improve the curb appeal of your home, which directly affects both your well-being and your home value. It’s a win-win, and we think it’s something that every homeowner should be able to enjoy.
What are the building blocks of well-designed gardens and backyard landscapes? Well, they are very similar to the building blocks of a poem, a song, or a painting. Garden design is an art form, and it benefits from the same ideas and structures that other art forms use every day. Read on to learn a few key basics that will help you unlock your inner garden designer.
Find Your Edges and Lines
Where does your garden begin and where does it end? While the flow of plants in nature feels effortless, in order to create a better sense of balance in a home garden it’s a good idea to decide the boundaries of your garden spaces, your lawn, and your seating areas. Even if there is overlap between them, choosing your overall layout is an important first step. Defining a space can be as simple as laying a circle of paver stones and as elaborate as building a fence or hedge maze.
Here are two ideas that will help as you determine what kinds of boundaries for spaces are right for you.
First, follow the lines of your home and lawn as they stand now. Anything permanently in the space should feel complementary to what you add around it. Remember to use the walls of your home and the corners of areas to your advantage.
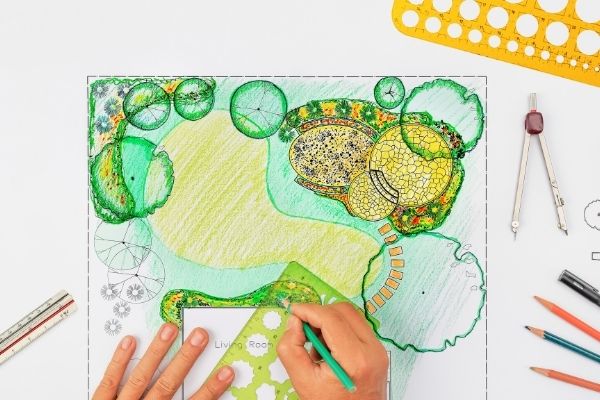
Then, follow the rule of thirds: If you are looking at the area you want to place your future garden as if it were a picture, draw two lines vertically through the image and two lines horizontally, evenly spaced from each other. This is a great framework to help envision where borders will feel most natural, where to place points of focus, and how tall or small your plants should be. Feel free to take a picture and really draw the lines!
A space will start to feel private and enclosed when the vertical heights reach at least one third as high as the horizontal distances in the area are long. They’ll feel open and spacious when they are less than one third. This helps with deciding wall heights or deck railings.
The Golden Ratio (approximately 1:1.16) is another great way to help make decisions about boundaries, fences, borders, hedges, and other framing elements.
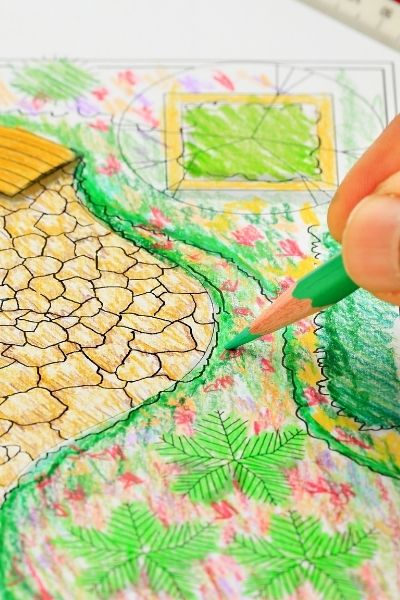
drawing a garden design with colored pencils
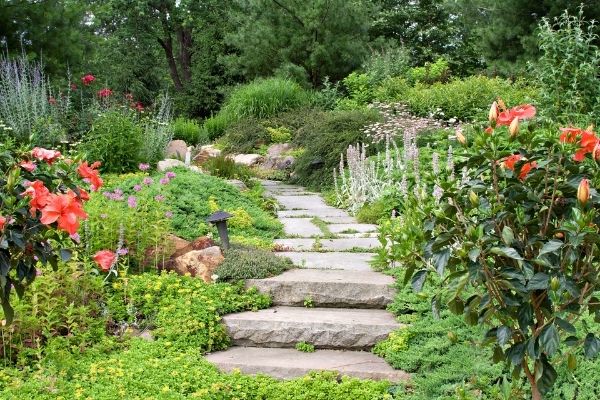
paved path nestled in beautiful garden
Build Structure First
Hardscaping is the art of shaping your lawn and garden with hard, more permanent materials: stone paths, fences, archways, pergolas, seating, fountains, water features, etc. It is so much easier to plant around hardscaping design elements than it is to plant delicate plants and then try to gently place an archway in between them!
Choosing your hardscaping will help begin the foundations of style and vibe to your landscaping design ideas. Are you going for a trendy gothic garden with ornate iron gates and mossy statues? Do you love the modernist look of clean lines and solid stone walls? Or do you want the relaxing classic cottage feel of cobblestone pavers and wicker furniture? Matching the style of your plants to the style of your stonework and hardscaping will create a sense of harmony, no matter what garden style you choose.
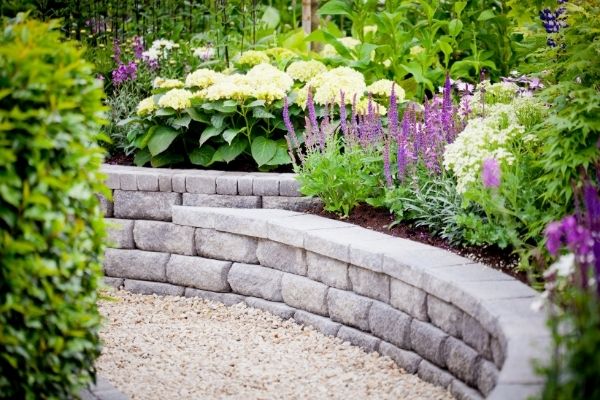
beautiful garden with rock wall of pavers hydrangeas and salvia
Add A Sense of Mystery
While you’re still designing a big picture and overall shape to your garden, think about creating little pockets of privacy. This is why winding paths are so fun in garden spaces: you can create visual interest by making your guests wonder what is around the next corner, simply by blocking their view ever so slightly. The reveal of a larger garden space behind a gate or just past a small hedge adds to the joy of a garden. Also, creating private spaces means you can enjoy a little privacy yourself as you relax in the garden you designed.
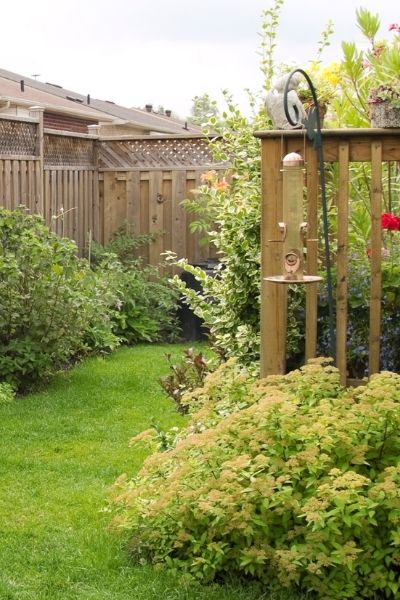
a fence blocking part of a garden
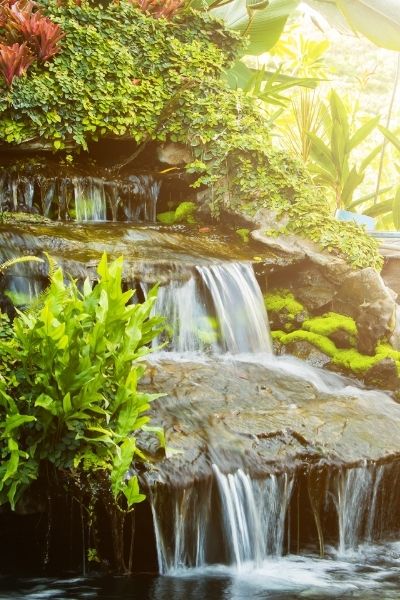
a water element bathed in sunlight in a garden
Consider Your Environment
Ok – we’re getting closer to choosing plants, trust us! Next step, you need to create a key for where the sun reaches, what direction the sunlight comes from, and how warm, cold, or windy various spaces can be in different seasons. This is why most landscape designs are drawn from a birds’ eye view: in addition to seeing the whole picture regardless of any curves or hidden outdoor living spaces you envision, you can also see exactly where north and south are, where a tree will create a shady area, and whether or not an area could use a wind-break or privacy wall. Watch your space and see what it looks like at different times of the day.
Key places to look for are areas that are in the sun all day, areas that get morning sun and afternoon shade, places that have morning shade but cook in hot afternoon sun, any areas where the water doesn’t drain as quickly after it rains, and any areas where your garden hose will have trouble reaching to water your freshly planted garden. If you come to Patuxent nursery and discuss your garden ideas with our staff, these are the first questions we will ask since they are integral to choosing the right plants for you.
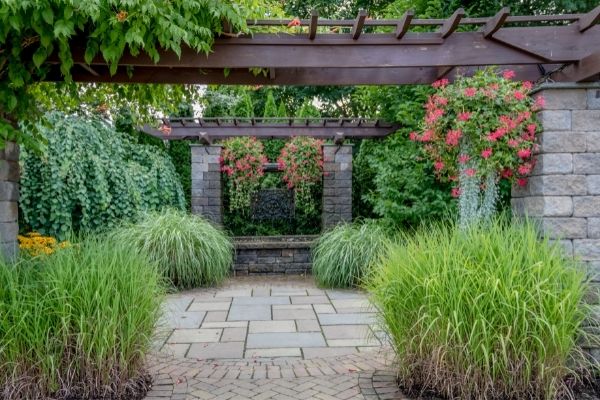
walls and ornamental grasses that flow together well
Think About Your Transitions
Transitions are where one area or layer ends and another begins. Typically, gardens feel balanced when the tallest elements are in the back or at a central focal point, and the plants surrounding them lower in height gradually. A few exceptions can create visual interest, but you don’t want to completely hide your dwarf butterfly bushes behind your ornamental grasses. The rule of thirds can help with this rule as well. When creating hidden spaces, if some plants are not visible from one angle they should be able to be enjoyed from a different angle, rather than completely hidden.
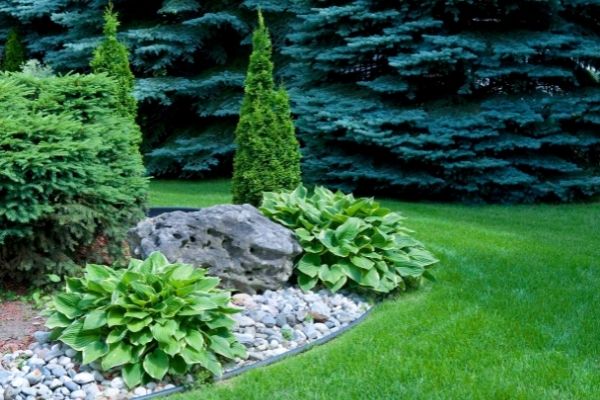
repeating evergreens in a garden
Create Unity And Flow
Poems and songs have refrains, choruses, and motifs. Paintings have themes and patterns. In a similar way, repeating the same plants in different areas will create a sense of cohesion throughout your garden. This is why it’s usually better to choose a short list of key plants that you repeat in groupings, and then you can mix things up in front garden beds or little areas with more variety.
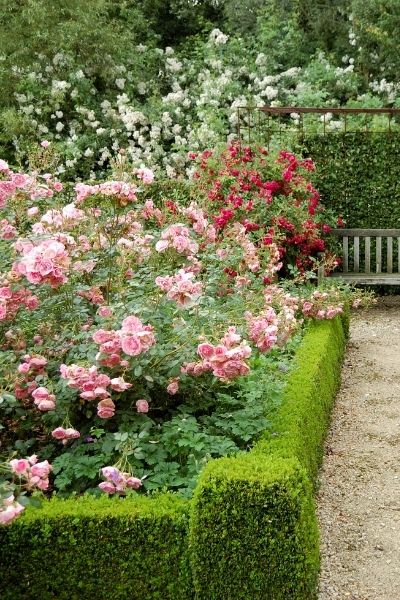
group of roses within a hedge
Plant your plants in larger groups to create better visual impact. Rather than planting a plant one at a time, plant them together in groupings of 3, 5, 7, or 9, and then repeat those groupings in between each other. You can also use larger trees or shrubs as anchor plants and space them out along your garden as another way to create unity and flow between areas.
Larger groups that flow are often called “drifts”, and when those plants are in bloom they make the most attractive ocean of color. Hedges, in contrast, are usually in long lines and are used to create a boundary between areas of your landscaping. Hedges can be tall, like a privacy wall, or low in order to frame a walkway. You can even use hedges to create a garden maze if you’d like!
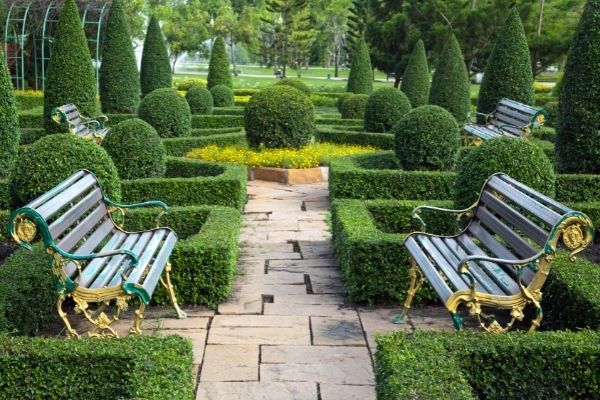
ornate chairs match the classic hedges
Another part of unity in a garden is a matching style. Remember all of that hardscaping? Well, don’t forget to match your plants to the garden style you’ve established. Cottage gardens with cobblestone pavers and ivy walls will complement roses and lilacs, while contemporary minimalist furniture will match well with ornamental grasses. Roman-style statues pair stunningly with classic boxwood hedges and topiary. It’s not that other choices will clash necessarily, but keeping your plants in theme with your garden designs will elevate your outdoor spaces to that next level.
colorful plants along a walkway
Paint By Color
You’ve mapped your landscape design shapes and lines, you’ve determined what kind of light and water is in your area, and you’ve made choices about what kinds of patterns and transitions you want to use… Now, the fun part: painting by color!
As you finally start to choose the specific plants you are planting in your garden, stick to a cohesive color palette. This doesn’t mean you need to stick to colors on the same side of the color wheel: on the contrary, plants in nature often criss-cross across the color wheel in order to attract more pollinators!
The colors in your garden will change throughout the year and can change anytime you want to replace a plant with something different.
Being creative and designing around these changes is part of why gardens can grow and change with you over a lifetime, no matter what structure and form you decided on early on.
Below is a review of color theory. This is a tool to use as a simplified framework – it can help keep your garden feeling unified while also creating the mood and energy you are looking for. It can also help you choose which annuals to play with, which pots to match with which plants, and much more!
Color Theory,
In art, colors are organized around a color wheel – this is the rainbow flow between all visible colors divided into 12 main colors. The cool colors include Violet, Indigo, Blue, Teal, Green, and Chartreuse. The warm colors include Yellow, Gold, Orange, Red-Orange, Red, and Magenta. Within these 12 colors in these two categories fall every single imaginable color combination, give or take a few mixtures.
Note: White, Black, Gray, Brown, and Green are all considered neutrals in gardening and can be used however much you want to use them. Green can also be a focal color or accent – it’s up to you!

woman holding a color wheel
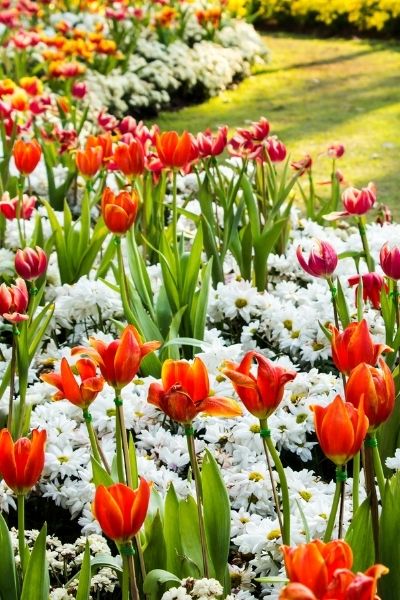
tulips and white flowers in long garden
Don’t forget to play with hue and shade within these combinations. Hue is when you lighten the color and add white, shade is when you darken the color. Anytime Red is mentioned, Pink and Oxblood should also be considered as options. Any time Indigo is mentioned, Periwinkle or Navy should also be considered. This is where the flexibility in your creativity can really get going.
The more simplified the color combination you choose, the calmer the mood of the garden will be. The more complex the combination, the more vibrant and exciting the garden will feel! Bright and vibrant gardens are great choices for pollinator gardens, while calmer and more subdued colors can help with a zen garden or relaxing, soothing sensory gardens.
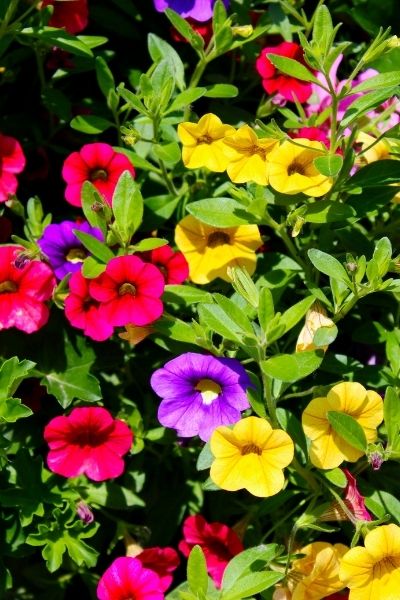
colorful petunias
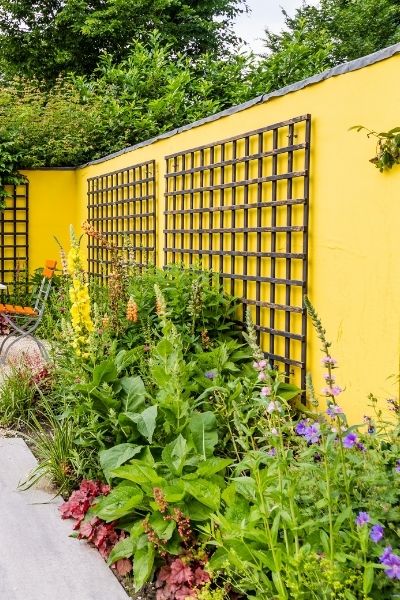
yellow wall with complementary plants
The various color combinations most recommended by designers include:
Analogous: three colors that are directly next to each other along the color wheel. Example: Violet, Magenta, and Red.
Complementary: two colors that are directly opposite of each other. Example: Yellow and Violet, or Green and Red.
**Split Complementary: Two Colors On the same Side of the Color Wheel and One color Directly Opposite of them. Example: Orange, Yellow, and Indigo, or Magenta, Red-Orange and Green. This is a gardening favorite!
Triad: Three Colors Evenly Spaced around the wheel. Example: Green, Orange, and Violet, or Blue, Yellow and Red.
Tetrad: Four Colors Evenly Spaces around the color wheel, either making a square or a rectangle. Square Examples: Yellow, Teal, Violet, and Red-Orange, or Chartreuse, Blue, Magenta, and Orange. Rectangle Examples: Yellow, Blue, Violet and Orange, or Red, Orange, Green and Blue.

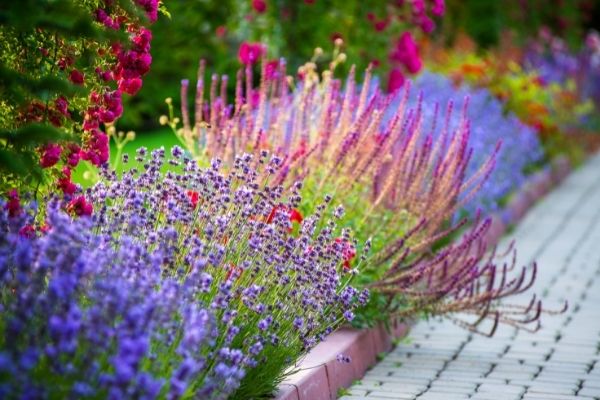
purple and green in gardens
Any other combinations with more focal colors than these will start to feel too busy and lose a sense of harmony – like your song struck a weird chord.
Having trouble keeping all of this straight? Go to your local art supply shop or craft store and pick up a portable color wheel, and bring it with you to come shop with us at Patuxent Nursery!
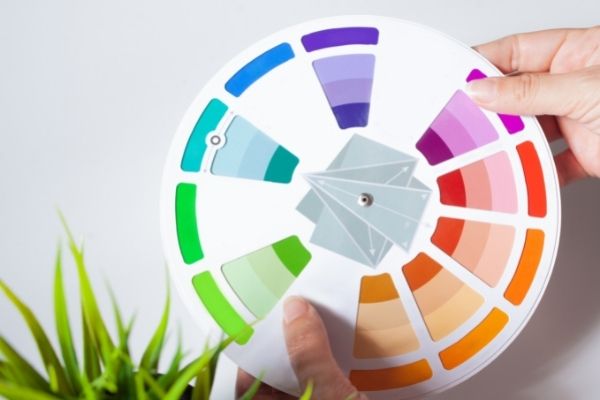
hands holding a color wheel
tart Small and Dream Big
o we’ve just covered a lot of design basics in gardening and landscaping. We haven’t even begun to talk about maintenance, seasonal changes, winter interest, or pest control. Gardening is a lifelong passion for a reason!
If any of this is overwhelming, you are not alone. We recommend starting small when you’re designing your own landscape for the first time. It’s always better to start small and grow your garden slowly than it is to spend lots of time and resources on a big landscape design, only to learn that the plants can’t handle the light conditions in your front yard and you need to replace them all.
If you start in one area, each growing season you can use cuttings, seeds or split perennials from your first garden area to grow your own plants and continue your themes in other areas. It’s a great way to save in the long run! Another way to start small is to plant young trees and shrubs. It takes a little patience for them to grow into the garden of your dreams, but it’s much more cost efficient to plant younger plants knowing how large they will get than to try and plant fully-grown trees!
Feel free to come and discuss your landscaping ideas with the staff at Patuxent Nursery. We love talking about gardening and helping you choose the perfect plants for you!

friends sharing plants in garden club
Get Crafty With Resources
In addition to propagating your own garden plants and planting young, there are other ways to save in your DIY landscaping endeavors. If you choose to compost your kitchen scraps, you can create your own fertilizers. Saving coffee grounds, fireplace ashes and egg shells are other home resources that can feed your garden. Planting lawn alternatives means you can save time on mowing, seeding or watering your lawn. Choosing plants that need less water is called xeriscaping and can help both your wallet and the environment. Use hanging baskets and raised beds to add color at taller levels while on a budget.
Your community will also have resources you can use. Repurposing abandoned furniture can create the perfect raised planters or planting stations. Local farmers will often sell composted aged manure for very cheap, which is another great way to feed your soil naturally. Garden clubs will often have seedling swaps and share young plants with each other. Other garden clubs sell young native seedlings for very affordable prices. There are a thousand different ways you can save on your landscape designs. Comment below if you have any ideas for how to get creative with DIY landscape design!
At Patuxent Nursery, you can find everything you need to build your own DIY landscaping dreams. From stone pavers to mulch, from fertilizer to young trees, from perennials to annuals to grasses to pottery to outdoor seating, you can design your perfect garden from the ground up.
We also have our own quarterly E-Zine where we have published a few free garden designs. Feel free to take these ideas and make them your own.
We can’t wait to see what you come up with!
[vc_text_separator title=”Spring E Zine 2022″]
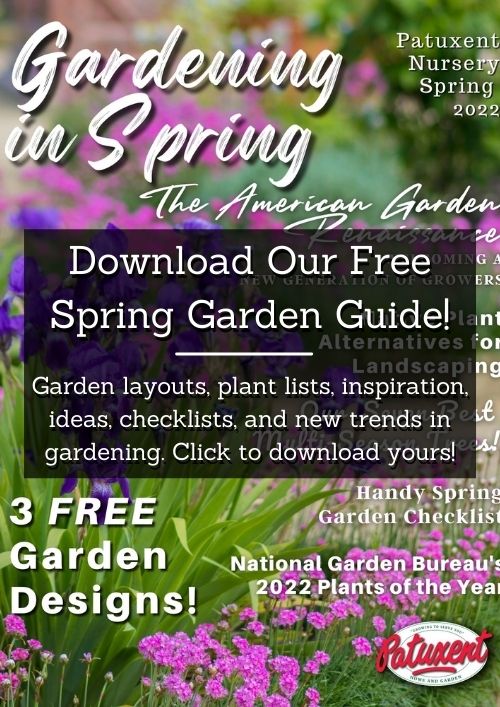
garden guide

pinterest banner key elements of garden design
Excellent write up…. 👍