
The goal of indoor seed starting is to have seedlings ready to go outside by the time the weather is favorable. This means that timing is everything. You will need to plant your seedlings early enough for them to germinate and start growing before you can transplant them outside.
To start, take a look at the seed packet. Usually, on the back, the packet will tell you when you need to plant your seeds. Look for something similar to “Plant inside 6 to 8 weeks before the last frost.” Keep your eye out for seeds that say “Direct Sow”, meaning these plants should be planted directly into your garden. These seeds require less labor and mature faster than transplanted crops.

Getting The Materials Right
To start, gather your materials. In the beginning, you will need the correct containers, soil, and a heat mat (or a sunny windowsill).
Make sure your containers are at least 2″ – 3″ deep and have drainage holes. You can use nursery pots or DIY containers made out of plastic yogurt cups, but we prefer using seed trays. Some bigger seeds will require a bigger pot to start. You can find this information on the back of the seed packet.
The potting medium (or soil) that you use is very important. Using regular potting soil or soil from your garden is not a good idea as it can harbor disease and dries out too quickly for seeds.
You want to choose a sterile peat moss-based mix. Peat moss offers less compaction, has greater water-holding capacity, and is easier to sterilize. Choosing a sterile mix is a must to help prevent disease and ensure your seeds/seedlings stay healthy. Look for seed-starting soil, like the ones found from Fox Farm®.

Prep Your Containers
Before you can plant, you will need to moisten your potting medium. Grab a bucket or tub and mix your soil with water until it is the right consistency. You want it to be wet but not sopping wet and gloppy, soil that is too wet can cause rot. You want your soil mix to resemble the texture of a wrung-out sponge. Also, make sure you don’t let it dry out – it is difficult to re-wet.
Once you have moistened your soil, it is time to prepare your containers. Fill the containers and pack the soil firmly to eliminate gaps and air pockets.
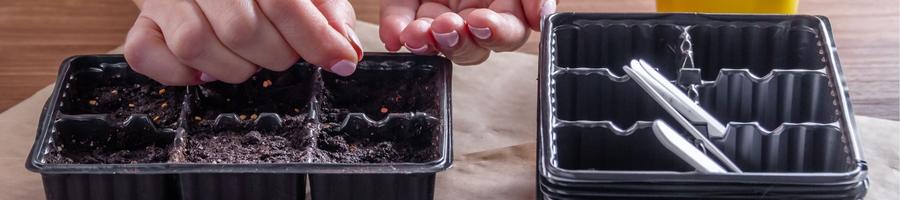
It’s Time To Plant
Now that you are ready to plant your seeds, check the seed packet to see how deep your seeds should be planted. While some can be sprinkled onto the soil’s surface, others will need to be buried in the soil.
For the ones that need to be buried, it will be easier to create a small divot in each of the containers. Drop the seeds into each divot, then go back and cover them with soil. Moisten the newly planted seed by misting them or by lightly watering them.
To speed up germination and keep the seeds moist, cover the containers with a clear cover. Some trays like the Nanodome Mini Greenhouse® come with plastic dome covers. If you do not have a system like this or are using a different type of container, plastic wrap will work well.
Caring For Your Seedlings
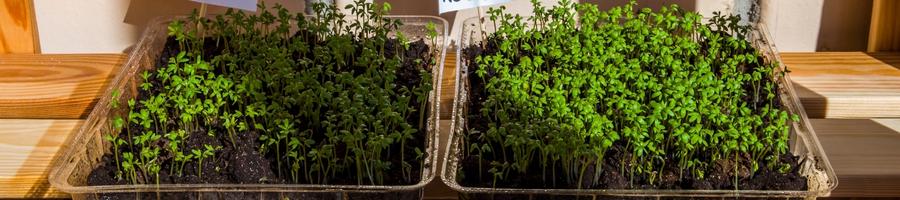
Once you have planted your seeds, keep them on a warm surface, either a heat mat or a sunny, warm windowsill. Most seeds germinate best at a temperature of 65-80 degrees Fahrenheit, however, there are differences in germination between cold and warm-weather veggies.
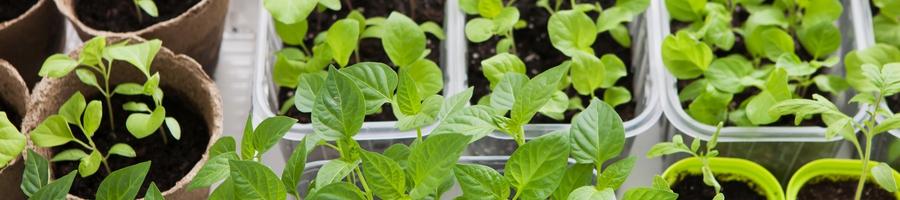
Once seeds have sprouted, provide sufficient light for them to grow. If you don’t have a sunny, south-facing windowsill, you will need to supply artificial light.
Grow lights are a popular option but make sure you are choosing the right one for growing seedlings. An incandescent light works to supplement light for your houseplants, but will not be strong enough to grow seeds. You want to choose either a LED or fluorescent grow light.
If you are using a grow light, make sure the light is a few inches above the seedlings and set the lights on a timer for 15 hours a day, allowing your seedlings to rest when the light isn’t on. As the seedlings grow taller, raise the lights, keeping them a few inches above the seedlings.
You will want to fertilize your seedlings, but not right away. Wait until your seedlings have a second set of leaves before you start to fertilize, then dilute your fertilizer to half-strength. Use either liquid fertilizer or a slow release like Osmocote. For truly organic, you can use fish emulsion, but beware of the smell!
Transferring Your Seedlings
Once they are ready to go outside, you can start to harden off the seedlings. After you have been coddling them for weeks, you will need to transition them outside before the ‘big move.’
A week to 10 days before you plan to set the seedlings into the garden, place them in a protected spot outdoors (partly shaded, out of the wind) for a few hours, bringing them in at night. Gradually expose them to more and more sunshine and wind until they are ready to be planted
When you are ready to plant your seedlings in the garden, take the seedlings out of their plastic pots and gently plant them into the ground. If you used a peat pot, remove the bottom and place peat pots below soil level so moisture does not wick from the soil.
Now you’re on your way to a thriving garden!
Great advice!