With the heat upon us, our plants are struggling to survive. Just like us, our plants need watering, some of them even daily. Let’s discuss how to make this process easier for you. A soaker hose is a wonderful tool and much easier to use than you might think.
Installing Your Soaker Hose
- Attach the soaker hose to a lead hose (a standard garden hose) that is connected to a faucet.
- Dig a path in your mulch big enough to sit a hose around your plants.
- Place the hose in the path and cover it up with the mulch that you dug away.
- When connecting soaker hoses together, don’t exceed more than 100′. Doing so may disrupt your water flow.
- When you turn your water on, you want to maintain a steady slow stream.
- Give your garden beds 2″ of water (including rainwater) every week during the summer months and 1″ of water (including rainwater) every week in the spring.
- You can also attach a timer to your faucet making what was once a bear of a chore into a thing of the past.
[vc_column width=”1/2″][vc_custom_heading text=”Choosing the Right Soaker Hose” use_theme_fonts=”yes”][vc_column_text]
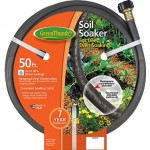
[/vc_column_text][vc_column_text]Check out Green Thumb Soil Soaker in 25 ft or 50 ft length.[/vc_column_text][/vc_column][vc_column width=”1/2″][vc_custom_heading text=”Choosing a Timer for Your Soaker Hose” use_theme_fonts=”yes”][vc_column_text]
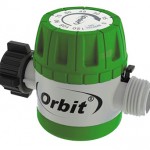
[/vc_column_text][vc_column_text]Consider getting the Green Thumb Manual Water Timer.[/vc_column_text][/vc_column][/vc_row]
Leave a Comment
You must be logged in to post a comment.